Table of Contents
- Use Google News to assess site fit, focusing on original content and DA/DR 70+ for credible media coverage.
- Confirm article originality by checking syndication status, press release formatting, and whether the author is in-house.
- Evaluate journalist fit by verifying recent activity, topic relevance, and history of writing true news stories.
- Prioritize outlets that include external, dofollow brand links, not just internal or nofollow links.
- Consider external timing factors like local news cycles or weather events that may impact outreach success.
- Use ListIQ to quickly surface journalist activity, syndication status, and contact details for outreach precision.
As we’ve been working on our ListIQ product, I’ve been doing a lot of email outreach and have some tips for what to look for in a site to determine if they will cover your story.
The vast majority of the agencies and PRs I’ve spoken with use a combination of media databases and Google News.
For this post, I will base much of it on a process for building a media list or finding journalists using Google News.
I’ve broken this down into sitewide fit, author, article, and extra evaluation criteria specific to PRs.
If the answer is no for any evaluation in this post, it’s usually not a good fit for outreach.
Evaluating Site Fit
This section is about looking at the site as a whole.
1. Is this a news site?
You’ll find that organization sites, government websites, and even brand blogs get looped in with the Google News results when searching Google News and some media databases.
For instance, when searching for “tax credit” in Google News, I found this article:

This is from the California Budget and Policy Center, a non-profit organization.
How to Evaluate?
The URL will provide most of the information you need, but you could also look at the About Us page.

Just because a site is a non-profit organization doesn’t immediately discount it, but it’s a negative signal.
I would then move on to more article-specific evaluation to see if they share external sources. Some .orgs or .govs may be interested in your news, especially if it presents their organization or city in a positive light (like winning an award or top ranking in a city index).
2. Is the site original news (not syndicated content)?
Not all news sites provide original stories. Some of the top-trafficked “news” sites are just aggregator sites.
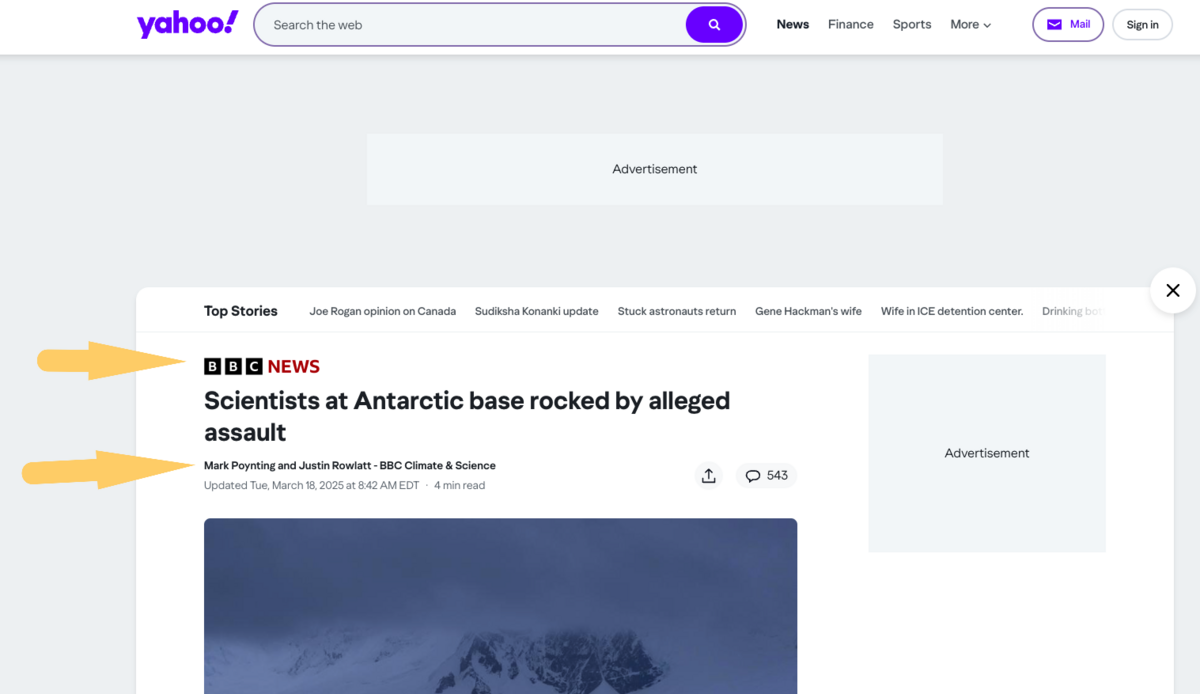
Although they have some authors, most of Yahoo News’ content is syndicated.
For instance, the below article from Yahoo is actually a syndicated story from BBC News.
How to Evaluate??
Most of the sites that use syndicated content do a good job of pointing it out. It may be very obvious, like Yahoo.
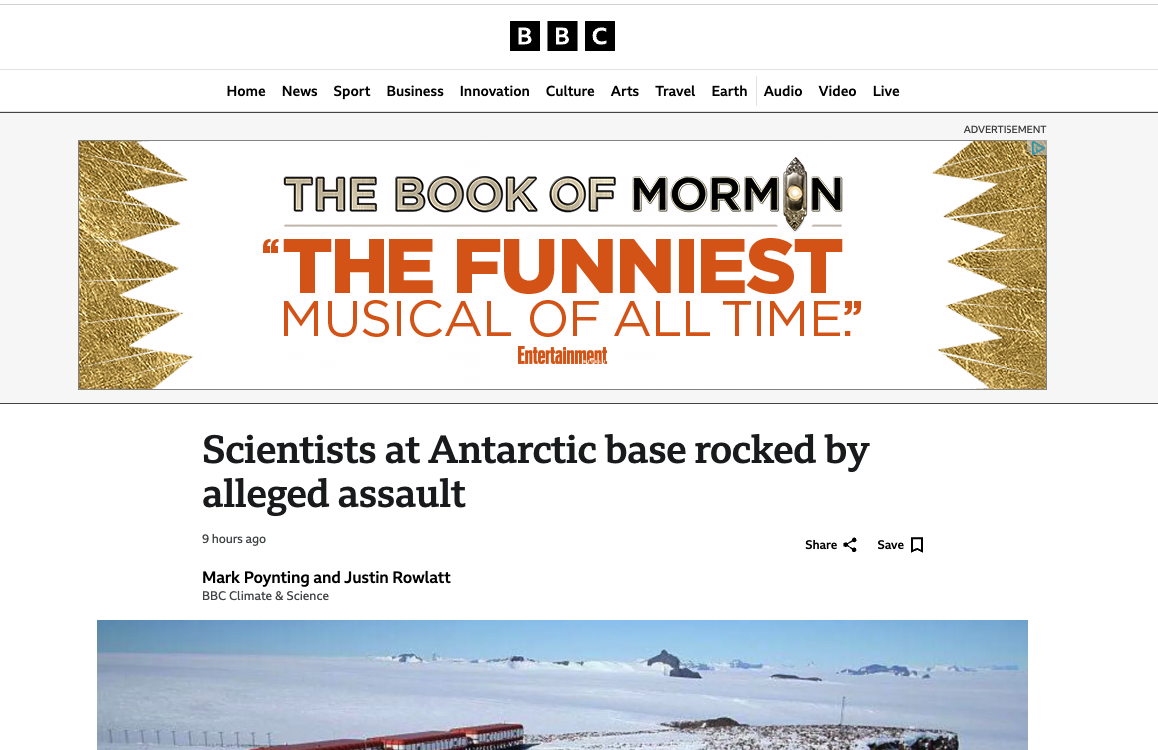
Another way to check is by Google searching the article title.
I found the original article mentioned above on BBC:
Sometimes, news sites will say “This article originally appeared on…” as well.
For instance, here’s an article on Salon that originally appeared on Alternet. They call it out very obviously:

So, in most cases, these are signals that the site itself may not produce real content. But it’s not entirely the case. For instance, Salon does produce it’s own content as well.
I’ll show you some ways to dig into this next.
Exceptions
Some sites that are mainly syndicated do actually have real authors. In this case, digging into the author will tell me where to pitch.
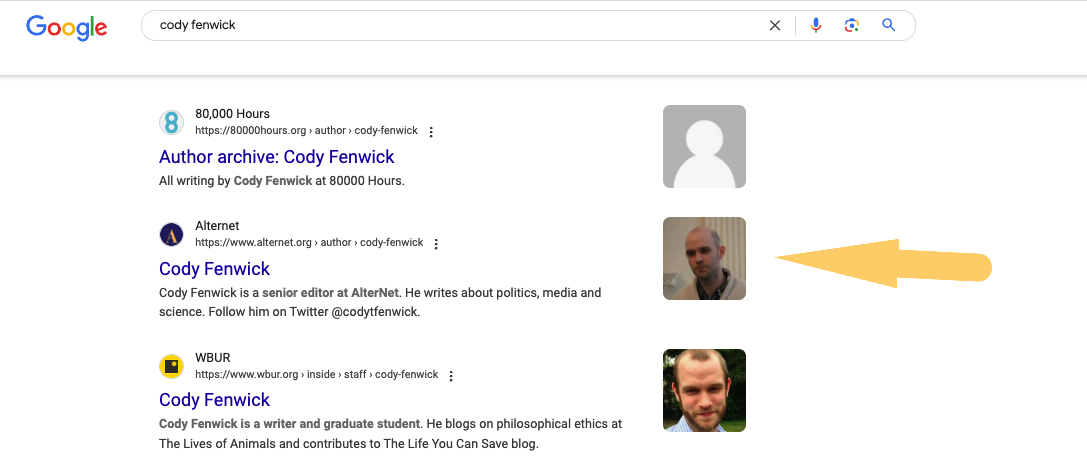
For instance, if I Google Cody Fenwick, the author of the above Salon article, I find that he is indeed the senior editor at AlterNet, not Salon.
But let’s take another site that typically syndicates: Yahoo.
Aside from the syndicated content, Yahoo News does have a section of its site with original content.
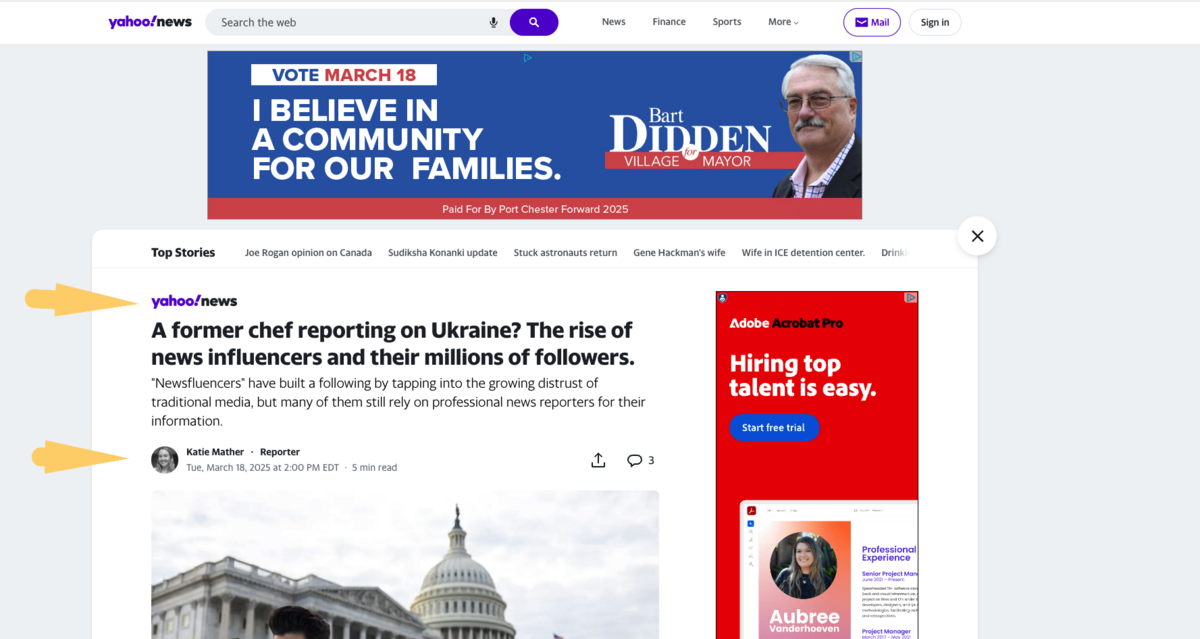
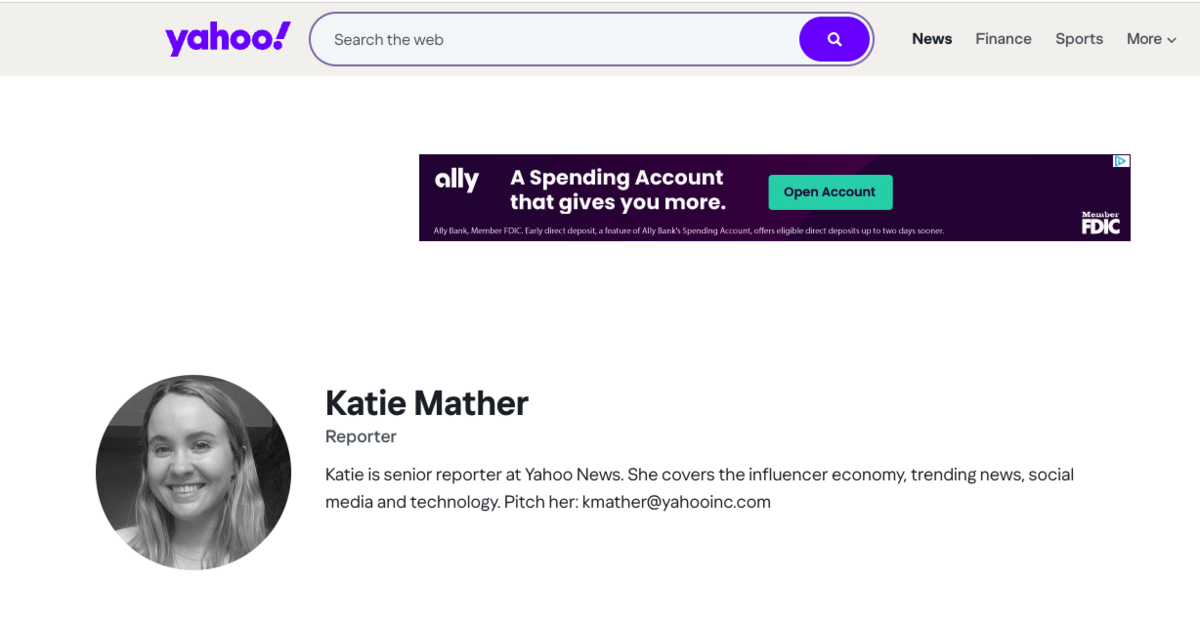
If I click through to Kate Mather’s bio (the author of the above article) I find that she is a senior reporter at Yahoo News.
So, it pays to dig into some of these sites if you really feel like a link is going to get you good eyeballs on your content!
3. Is the site over DA/DR 70?
A quick way to evaluate sites for quality is through a third-party authority score, such as Domain Authority or Domain Rating.
However, DA/DR are only meant to be proxies for quality and authority. They can’t tell you everything.
Most, if not all, mainstream news sites will be above 70.
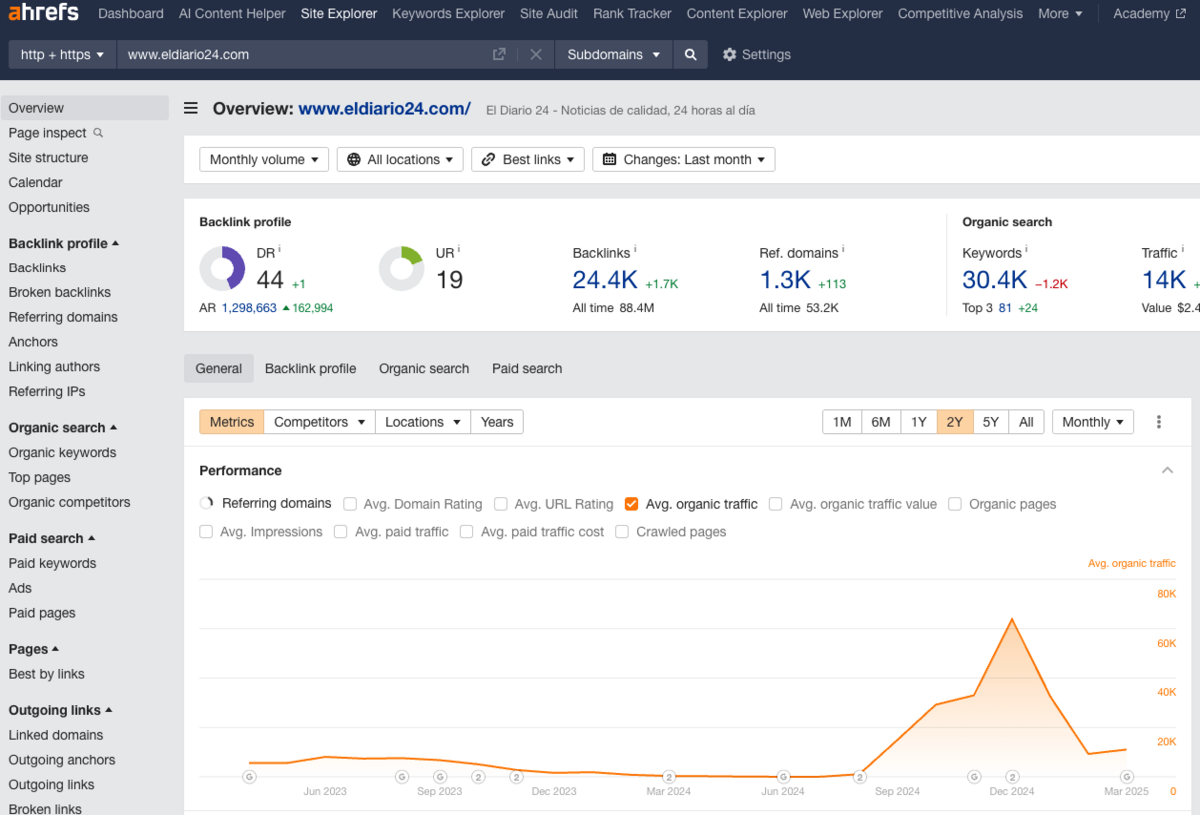
For instance, here’s a site that showed up on Google News:

This site has a low DR of 44.
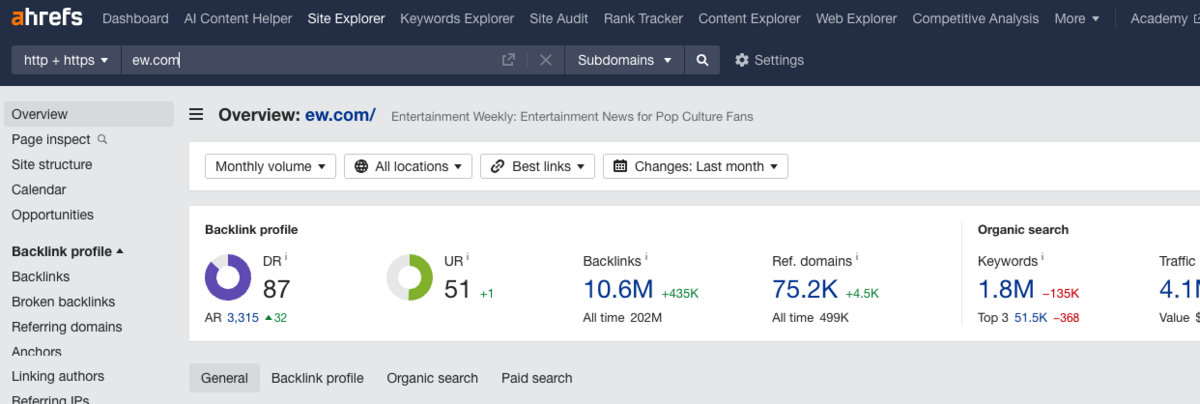
Compared to a site like Entertainment Weekly, which has a DR of 87:
These are quick signals for site quality.
How to evaluate
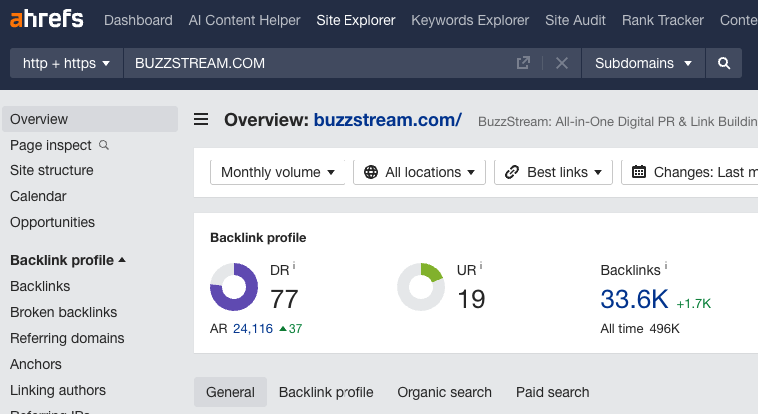
Use a tool like Moz’s Domain Checker or Ahref’s Site Explorer to determine a site’s authority.
SEOs may want to examine overall traffic, link velocity, traffic trajectory, and ranking keywords more deeply.
However, if I recently acquired a new client in the crypto or tech space and tried to evaluate websites for quality, DA/DR can help me get close.
Exceptions
There are a few things to consider from a site DR/DA consideration:
1. Sites can easily manipulate DR/DA.
We tracked this in our podcast with Jasper Morris. He pointed out the importance of looking at the organic keywords a site ranks for. If you see a lot of nonsense words ranking, a site may be artificially inflating its DA/DR.
2. Although newer sites may not have a high authority score, that doesn’t mean they aren’t quality.
I typically use the eye test. If it looks good, it probably is.
Quick Recap
| Evaluation | ✅ Green – Proceed | ⚠️ Yellow – Needs Review | ❌ Red – Disqualify |
|---|---|---|---|
| News Site | Clearly a news/media publisher (e.g., NYT, Vox, Patch) | .org, .gov, brand blog with potential relevance | Non-media (e.g., ecommerce blog, nonprofit with no media output) |
| Original Content | Majority of articles written by in-house authors | Mix of syndicated + original (e.g., Salon, Yahoo) | Fully syndicated or scraped content |
| DR/DA Quality | DR/DA 70+ or looks editorially credible | DR 40–69 or new site with potential | DR < 40 and spammy / AI-generated-looking |
| Syndication Status | Site has dedicated authors with original content | Site syndicates but links back to source clearly | Site republishes entire articles with no original value |
Article Evaluation
Once we’ve looked at the site overall, it’s time to drill down to the articles themselves.
4. Is the article written by the author?
This may seem obvious, but some articles are simply reposted press releases.
For instance, here’s a Yahoo Finance article that is just a press release from Business Wire:
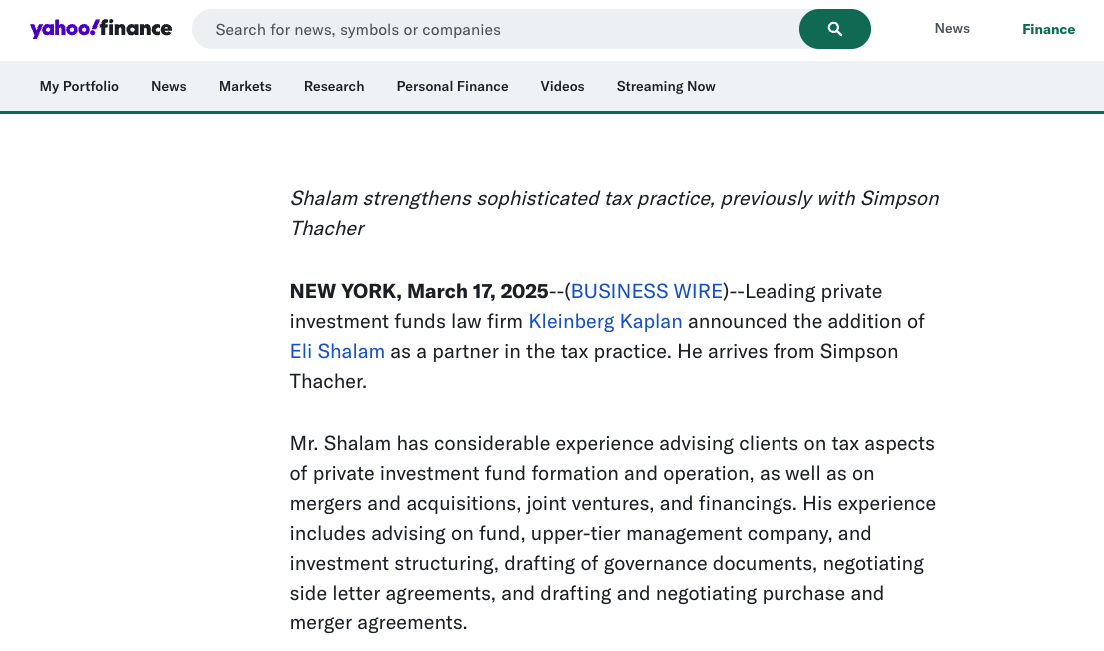
While most news sites author these by putting something like “news team” in the byline, others attach actual authors to them.
How to evaluate?
Press releases are formatted similarly. (We have an entire post on the anatomy of a press release.)
As mentioned above, look for the author byline. Most sites are fairly clear about if it is a press release or not.

Then again, here’s an example of a site that is not:

If you’re suspicious, copy and paste the headline into Google.
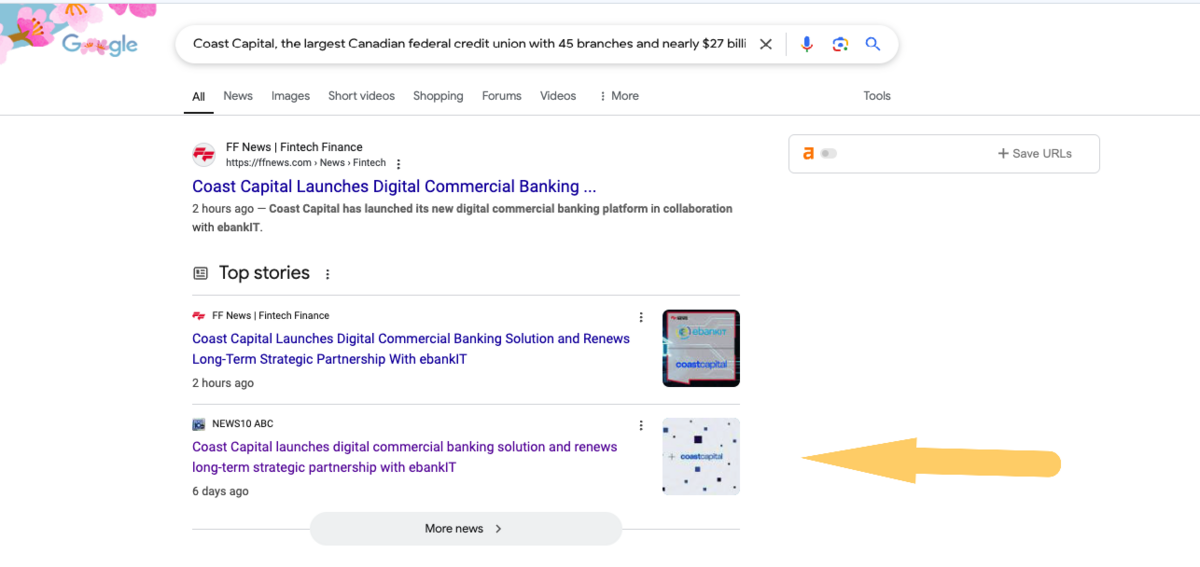
Here, I see that this same headline is mentioned in News10 ABC.
Then, I go to News10, I see that this is from EIN Presswire:

So, now that we’ve confirmed it isn’t a press release, we’ll need to do a few other checks.
5. Is the article a news story (vs. op-ed or SEO piece)?
Not every article from a news site will be about the news.
Articles may be part of a specific column, like an Op-ed, or they may just be SEO-driven articles from the publishers as they try to gain more organic traffic.
For instance, here is an article that appeared on Google News when I searched for “tax credit.”
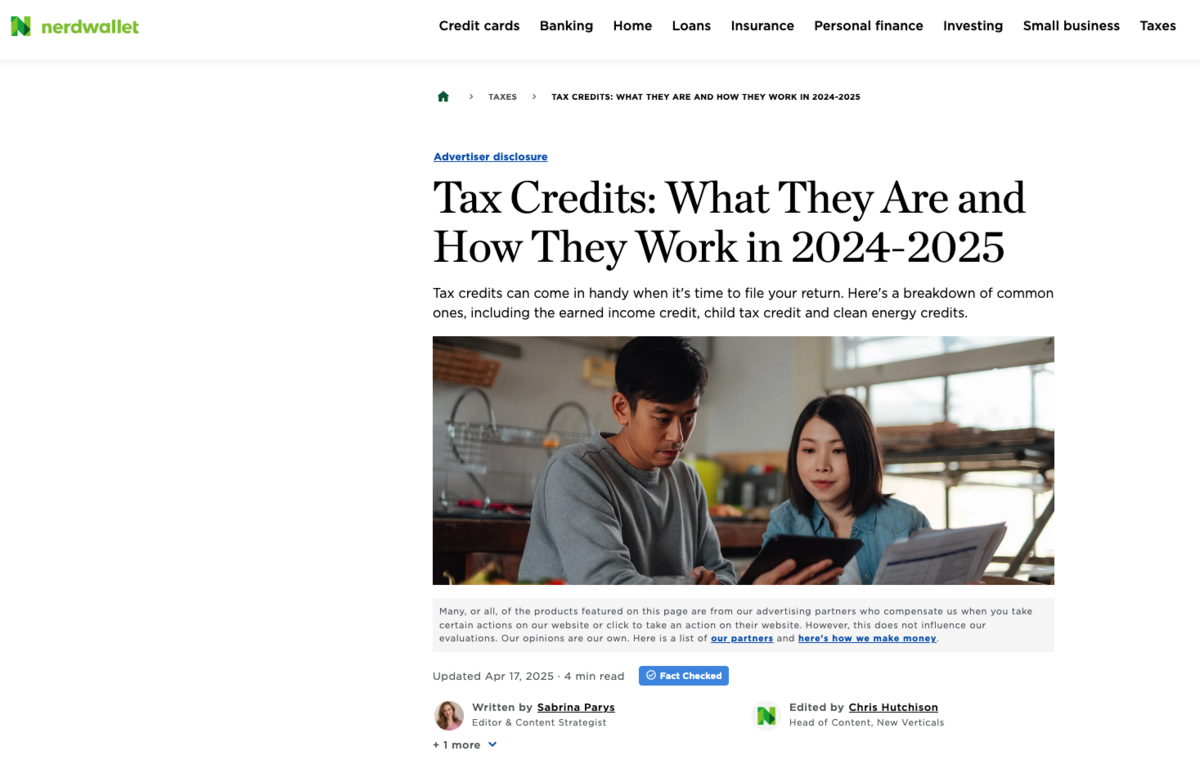
This article targets the keywords like “tax credits” and is not news.
Therefore, I wouldn’t pitch this to author Sabrina Parys.
How to Evaluate?
This one can get a little tricky, but one of the more obvious signals is how closely the title (and URL) sync up with the keywords the page is ranking for.
Here’s my workflow:
First, using the Ahrefs Chrome extension plugin, I see that the page ranks for 4.7K Keywords, and brings in 3.2K organic traffic.

Clicking on the keywords (KW) brings me to the Ahrefs breakdown, where they rank for keywords around tax credit 2024, which you see in the title: Popular Tax Credits for 2024-25
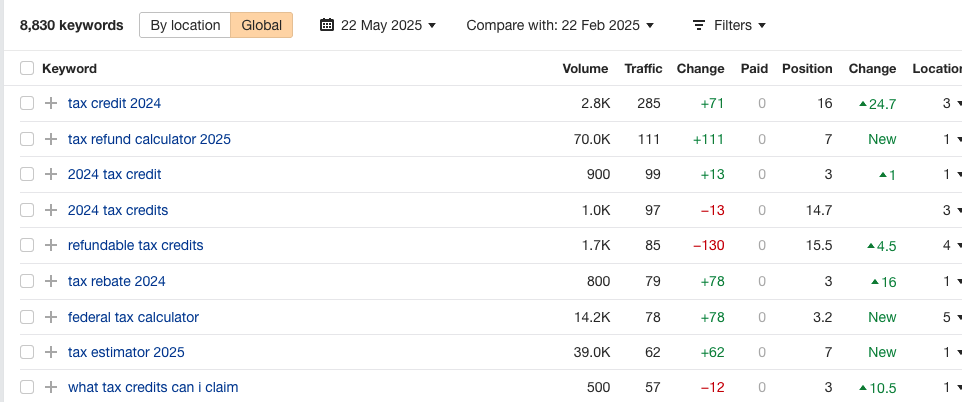
They also rank well for “What tax credits can i claim” which aligns with their URL: /article/taxes/what-tax-credits-can-i-qualify-for
This is an SEO post.
Although this isn’t universal, a good sign is if the post is more informational than actual news.
For instance, here’s an author who writes at Yahoo Finance and covers news:
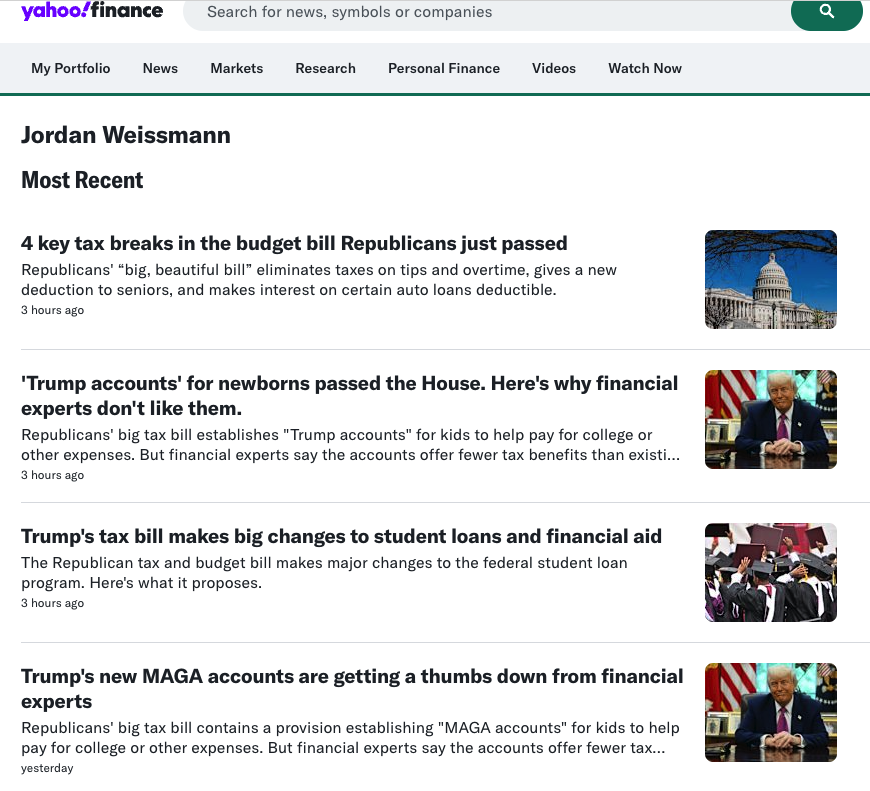
Here’s an author who writes at Yahoo Finance who writes informational articles primarily for SEO:

As you can see, news sites also write SEO articles (hey, they have to bring in organic traffic too!)
A single journalist may split their time between SEO articles and news articles.
That’s why it’s always good to check the recent articles written by an author.
6. Is the article text-based vs video?
This one is fairly self-explanatory, but worth mentioning because getting covered on video can definitely help brand exposure.
However, if you are building a media list from Google News it’s virtually impossible to tell if the articles are video articles.
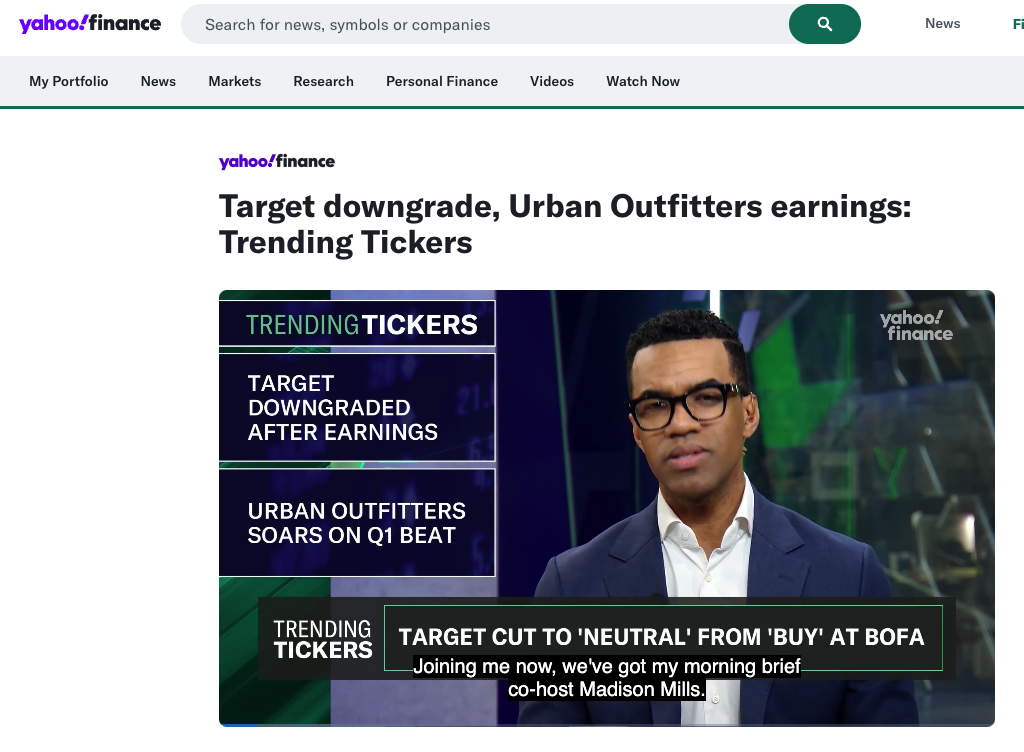
For example, this first post is actually a video article:
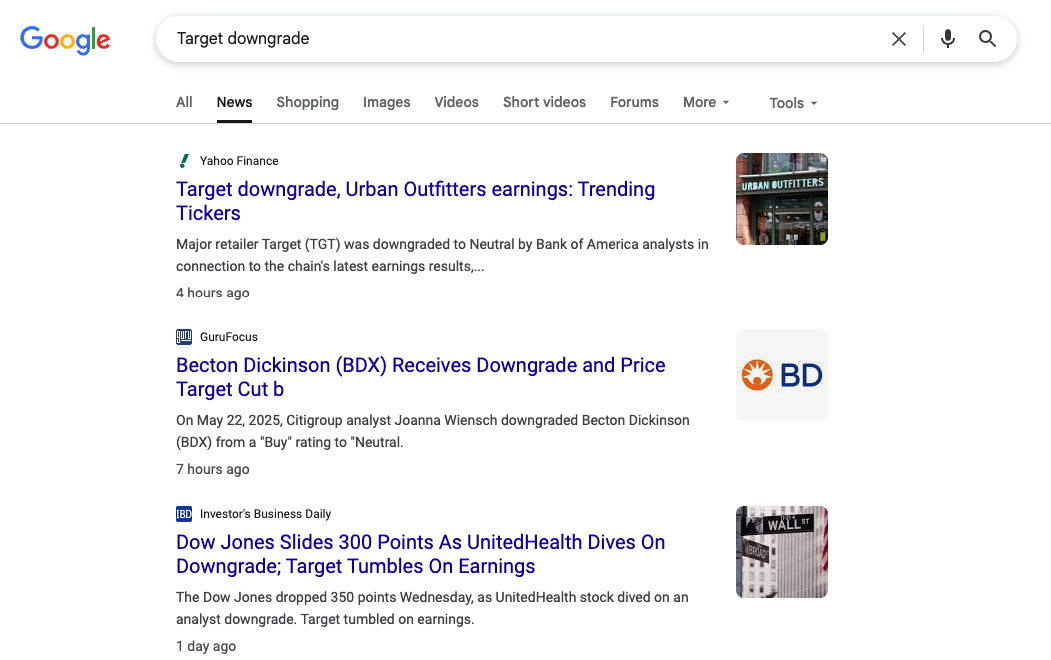
When clicking through, it’s actually a talking head-type article.
How to Evaluate?
Realistically, you’ll have to click through. Sometimes, video carousels show up in the Google SERP if Google thinks the query calls for them (or there are a lot of videos around the topic), but I’ve rarely seen them on Google News.
In these cases, pitching a video producer or reporters is still OK. I would just avoid pitching to editors.
7. Is it a sponsored post?
Sponsored posts are driven by advertisements, affiliate links, or both.
Brands either pay for link placements or pay out anytime the post sends traffic to their site.
When I find that a journalist has shared an article similar to my own story and it’s a sponsored post, that’s usually a negative signal.
It doesn’t mean that the journalist never writes non-affiliate posts; it just means that I need to continue reviewing their recent articles.
How to Evaluate?
Sponsored posts on publisher sites have strict disclosure guidelines so I’ll typically find the disclosures right at the top.

Some are less overt than others:
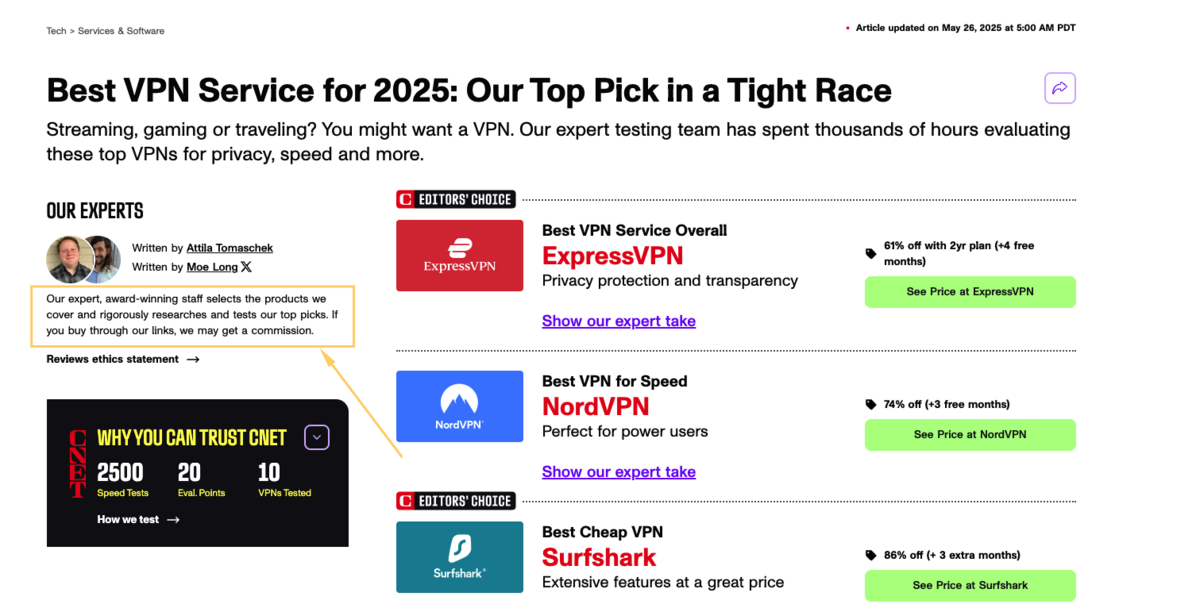
Another signal would be if I see that all of the links in the article are rel=sponsored.
In Chrome I’ll right-click on the link and choose “Inspect”:

(Technically the article should have both a disclosure and rel=sponsored, but that doesn’t always happen.)
Last, I’ll always check their recent articles to tell if the author tends to write non-affiliate stories.
8. Does the article include links?
Although links are seemingly less impactful for showing up in AIO, links still have a big impact on rankings and thus are a main KPI for digital PRs.
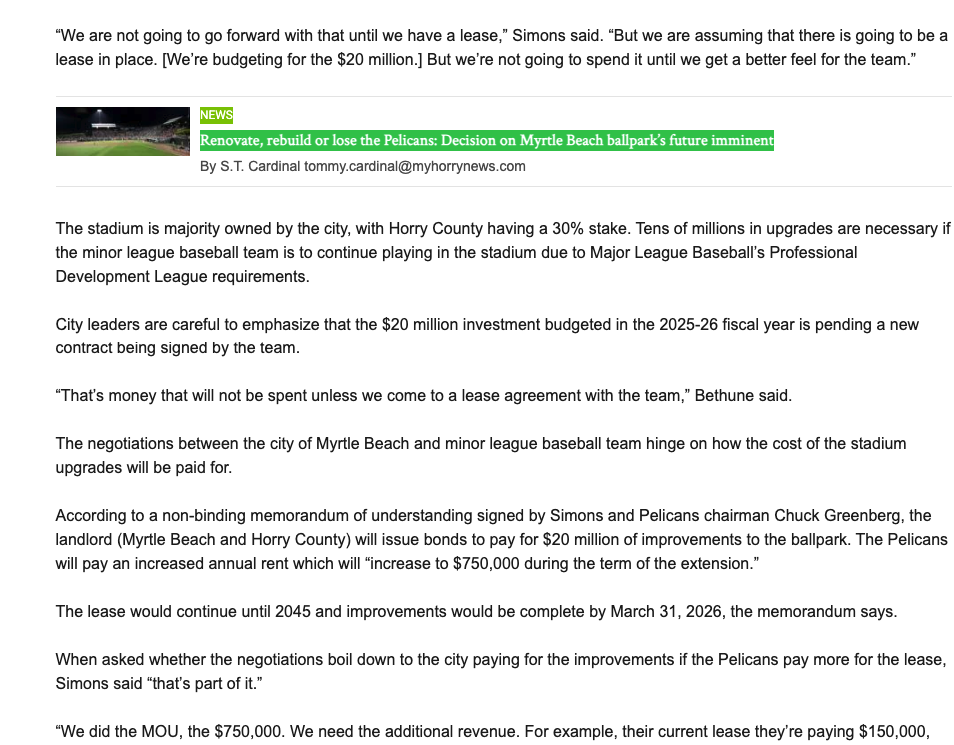
There are some pages that contain no links, like this one from My Horry News.
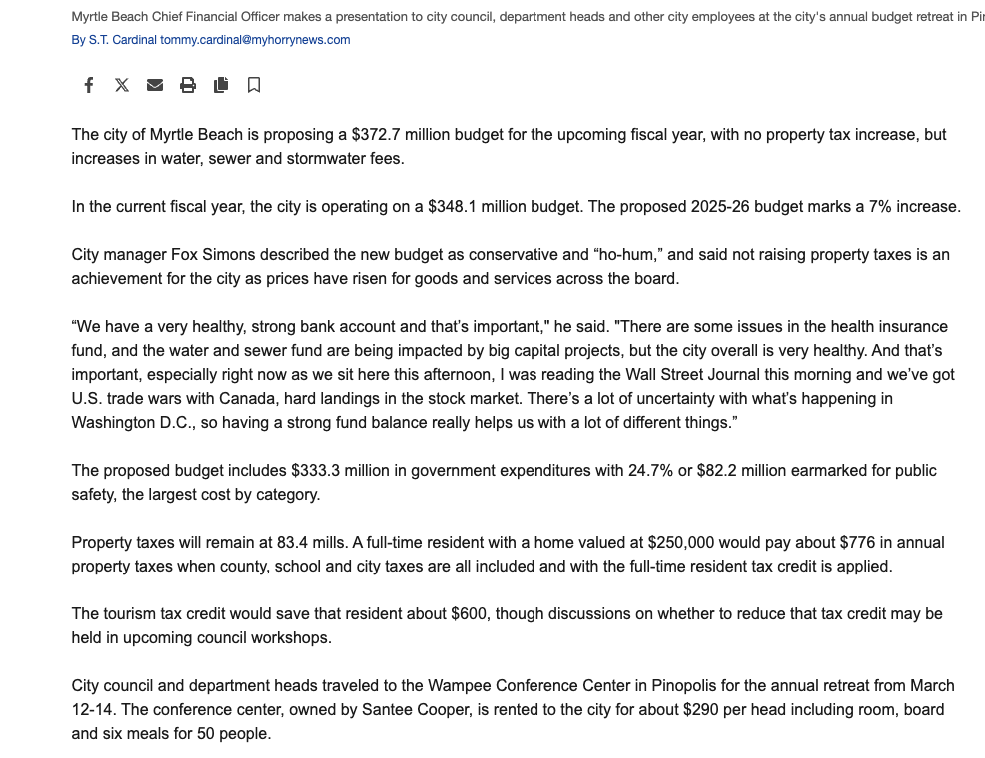
That said, a site like The DailyMail rarely if ever links out and it’s a staple of coverage for digital PRs.
Clients would rarely mind getting covered without links in a site that gets a lot of exposure.
How to Evaluate?
The easiest way to check if a site has linked out is to look manually. If you don’t see any hyperlinks, it isn’t linking.
Note that occasionally a site will have hyperlinks that they don’t style differently than the real text (meaning it has no style difference like underline, bold, or differentiated color).
One way to tell is by using a Chrome Plugin called Checkmylinks, which highlights all hyperlinks on a page.
For instance, in the screenshot below, it’s only found a few links on the recent articles section (highlighted in green):
The other is to press the tab key, which cycles through all links on a page.
9. Does the article include external links (vs linking to internal articles)
Piggybacking off of the previous evaluation point, there are some sites that include links but only to internal pages.
For instance, here’s a local news site called WRTV with an article about local property taxes. The only two hyperlinks in the article go to other internal pages.

This could just be a one time occurrence, so it’s important to check other pages by the author.
How to Evaluate?
The easiest way to evaluate if a site is linking internally versus externally is to hover over the links and see in the bottom left if they are linking to another domain.
For instance, here’s the WRTV article again:

When hovering over the links, it’s clear they are to internal pages.
10. Are the links follow (vs nofollow)?
Nofollow is a way to tell Google’s crawlers not to follow the link. Some sites will make all of their external links nofollow as a way to prevent diluting their link equity.
Other reasons I’ve heard are that publications don’t want to appear as if they are favoring one site over another, so they blanket nofollow all of them.
Regardless, this can have an impact on SEO (but again, not so much on AI exposure).
How to Evaluate?
Tools like Ahrefs Chrome Extension display all of the outgoing links and if they are dofollow vs no follow.
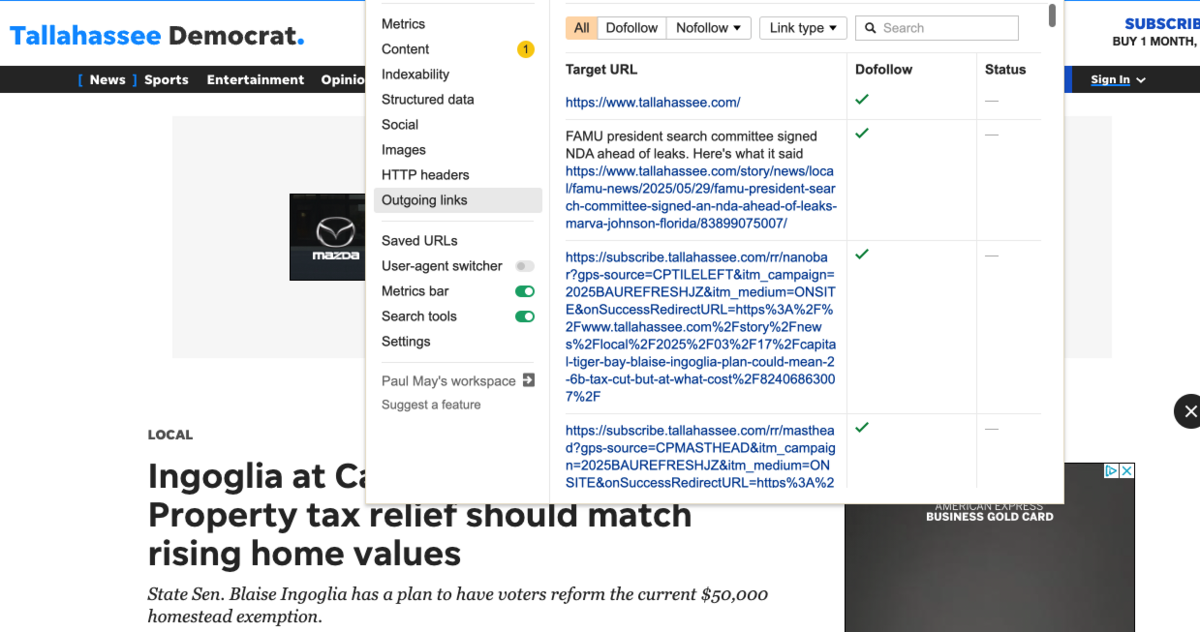
Another tool I discuss in our SEO extensions list is called Nofollow, which highlights nofollow links on a page.
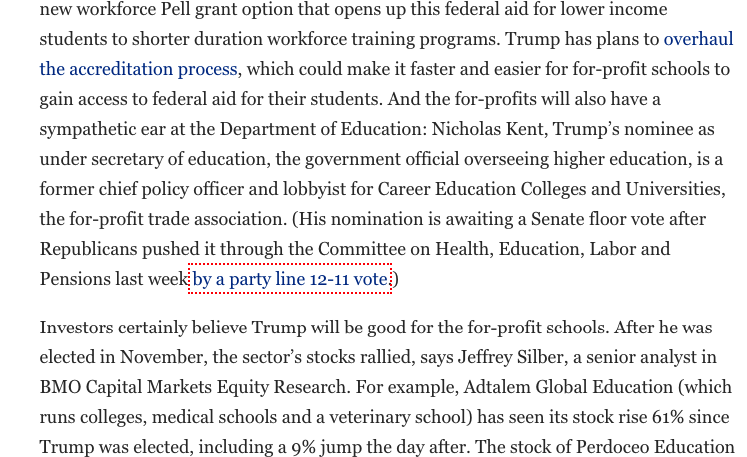
As you can see, the link above from Forbes is red, indicating that it’s nofollow.
11. Are the external links to sources from brands?
We are really getting into the nitty gritty of the evaluation process, but this one is a key differentiator.
Occasionally, a site will only link out to pages from what it deems to be “authoritative” sites. These sites are typically .org’s, .gov’s, and .edu’s (but not always).
Take a publication like The Conversation, for instance.

Their articles mainly reference scholarly studies, government data, and institutional reports.
Why is this important?
Because if you are Airbnb, you most likely won’t be able to get covered on The Conversation, even if your article or story has a scientific focus.
How to Evaluate?
Again, this is mainly a manual evaluation done by hovering over the links or with a tool like Ahrefs Chrome Extension.
Here’s a snapshot of a page from The Conversation:
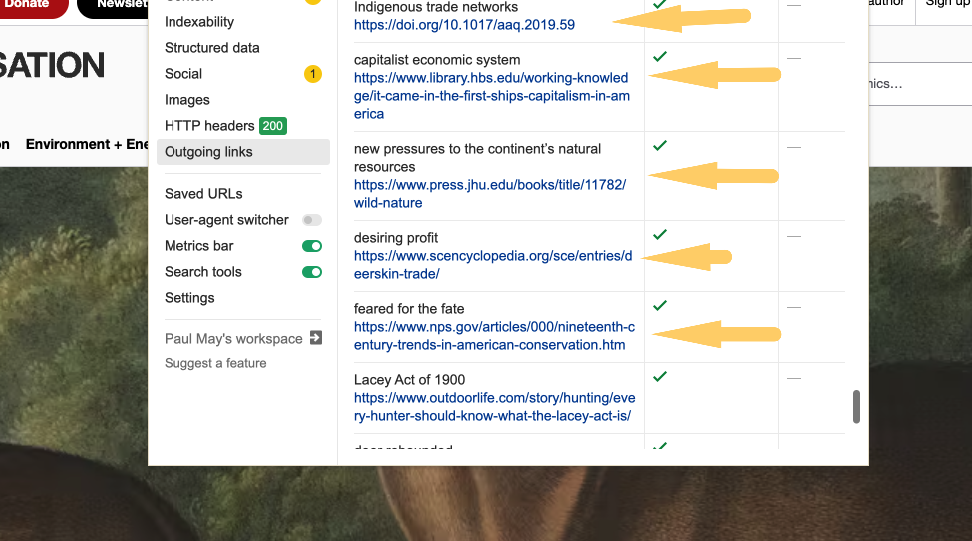
As you can see, most are .gov and .edu pages.
Quick Recap:
| Evaluation | ✅ Green – Proceed | ⚠️ Yellow – Needs Review | ❌ Red – Disqualify |
|---|---|---|---|
| Article Type | Clearly a news piece or exclusive | Could be evergreen/SEO content | Obvious SEO post, press release repost, or op-ed |
| Media Format | Text article with body copy | Video + text or interactive | Video-only, slideshow, no article text |
| Sponsored Content | No sponsor tags or disclosures | Affiliate/sponsored content mixed in | Clearly sponsored/affiliate-only |
| External Linking | Links to external brand sources | Links to .edu/.gov only | No external links at all |
| Link Type | Dofollow external links | Mix of nofollow + follow | All external links are nofollow |
| Link Style | Links visibly styled or detectable by tool | Few links, unclear styling | Hidden or 0 links present in body |
Author Fit
Now that we’ve covered some of the site-level evaluation and the article type, let’s get into the most critical part: the author.
12. Is there a single author (vs multiple)?
Typically, multiple authors are listed on larger interactive stories, data studies, or video content.
For example, a video story from 9News has two authors.

Steve Staeger is the consumer investigator, and Anna Hewson is the investigative photojournalist.

Together, they seem to make up an investigative news team.
How to Evaluate?
A quick Google search can reveal each author’s roles and help you determine who to pitch.
For instance, I did a site:www.9news.com search + Anna Hewson to determine Anna’s role.
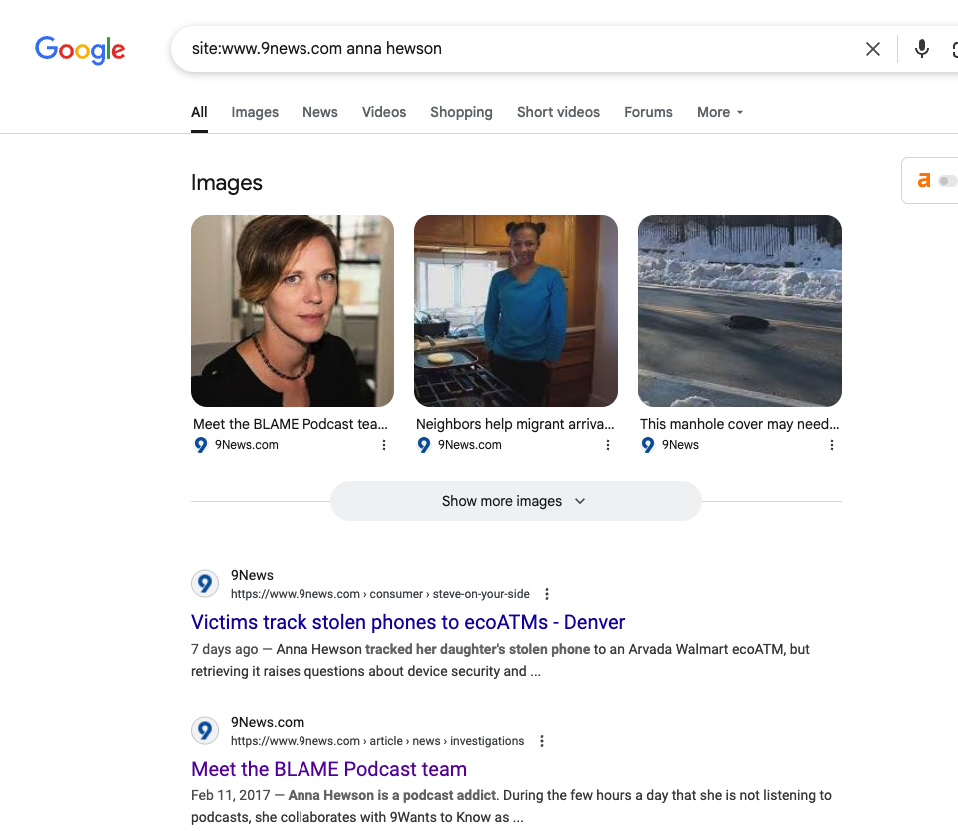
Like the previous tip, pitch the producer, reporter, or sometimes the anchor in videos.
When all else fails, try to find their author page.
That should tell you their main beat.
For instance, here’s a post about budget cuts to the NOAA from the Wall Street Journal.
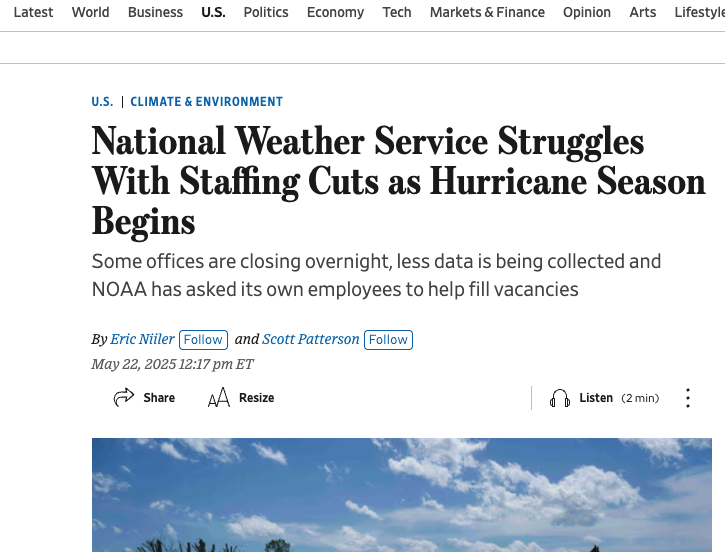
It has two authors.
One covers financial regulation:

The other covers climate:

Your pitches should always align with the topics the authors cover most frequently.
13. Is the “author” a person (vs a team or staff or newsdesk)?
There’s nothing worse than finding a relevant article only to find that it has no assigned author.

Most of the time, these are created by multiple team members, so there is no clear person to whom to pitch.
How to Evaluate?
You’ll need to dig deeper to determine who to pitch in this case.
For instance, if I were pitching a city study around air quality to Fox6, where Milwaukee came in first, I would need to do a site search to see if any journalists would fit.
The publication’s coverage of a similar topic is a positive signal, but I would rather send it to a relevant journalist than post it on a newsdesk or tip line.
So, a site:search for “best city” uncovered this post written by journalist Chris Williams last year.

Chris may be a better fit in this case.
There is one other check I’d like to make, which I’ll get to next.
14. Has the author published a news story within the past 30 days?
One of the more critical things to consider when evaluating an author is their participation in a publication.
Just because they’ve published a similar article doesn’t mean they are a good fit.
How to Evaluate?
The author’s page lists recent articles with dates, providing a clear sense of their activity at the publication.
For instance, if I visit Renju Jose’s author page on Reuters, I find recent articles with date stamps.
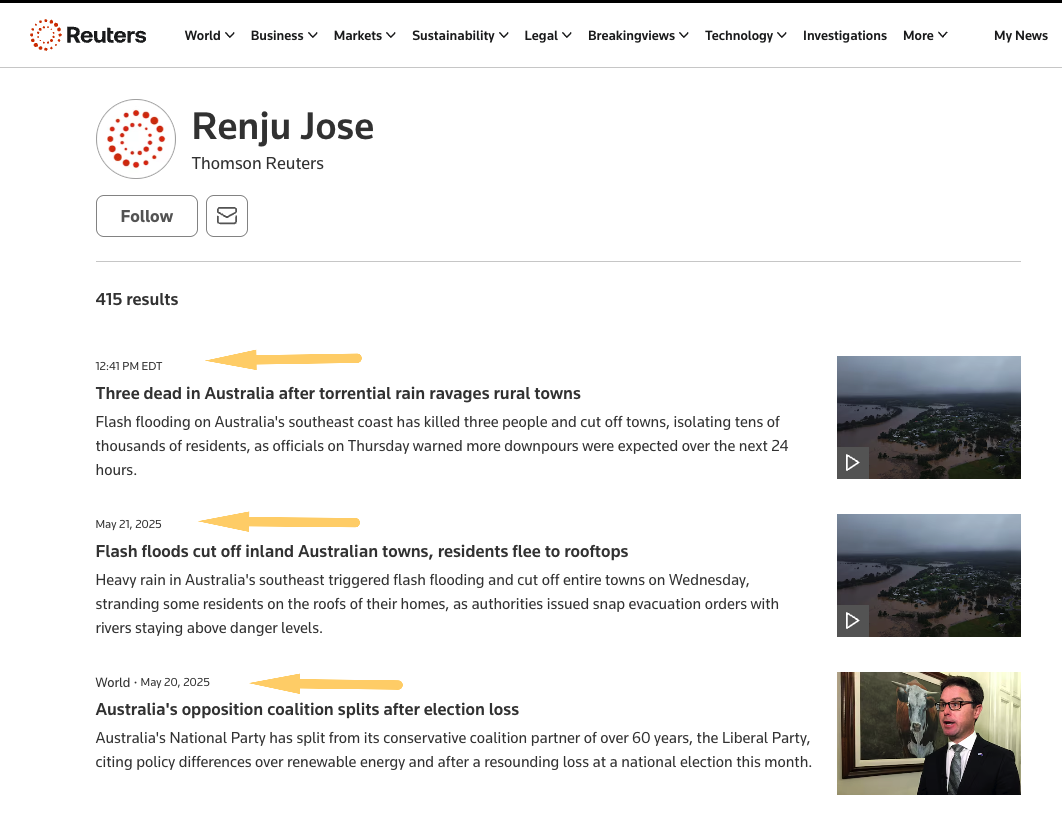
However, not every journalist has an author page on a publication.
Chris Williams from Fox6 isn’t a clickable link, nor does it look like there is a dedicated author page on the site.
So, I’ll need to use a site:search + author name along with a manual date check.
I click on the dropdown under tools, and I can toggle the date range for past week to see recent articles from Chris.
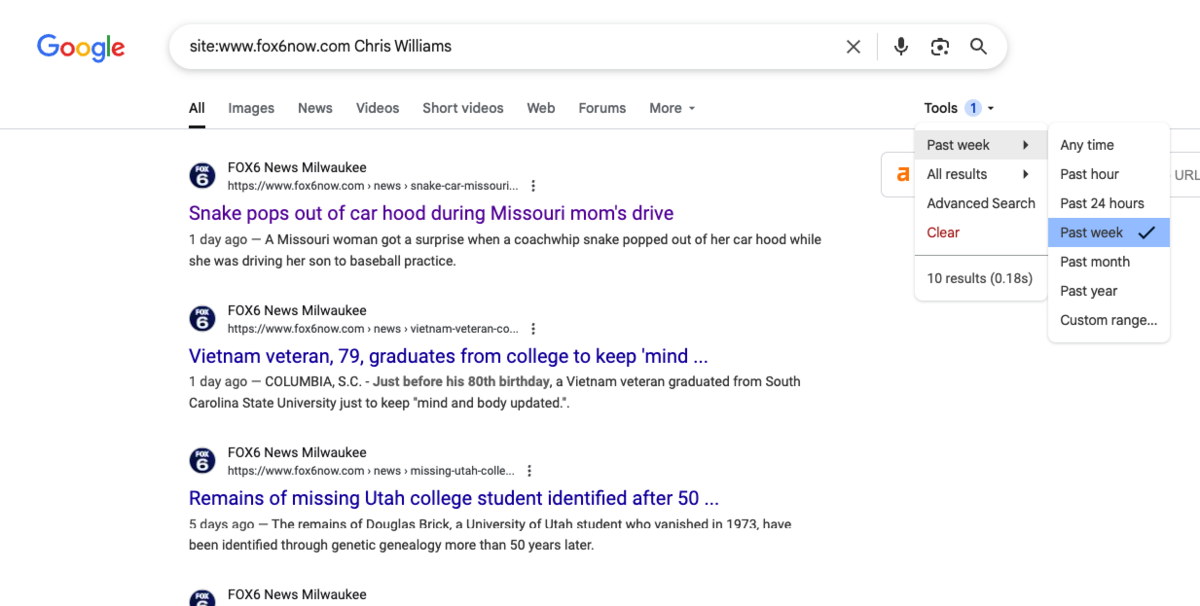
Based on the date stamps (1 day ago, 5 days ago), I can determine that Chris is still active at the publication.
15. Has the author published something relevant consistently?
Remember, just because someone has shared something doesn’t mean it is their main beat.
When newsrooms get busy, oftentimes journalists will switch beats to help cover areas that need extra hands.
Former journalist turned PR, Collin Czarnecki, told me about how a local newsroom changes during a big event like a flood or snow.
“When severe weather hits, it’s all hands on deck in the newsroom.
Regardless of a journalist’s beat or typical coverage, they’re likely to shift their focus to the weather — especially in understaffed newsrooms (a reality for most newsrooms across the country).”
Within this relevance bucket, I also consider factors such as political or geographic focus. For instance, if a site is very hard left and your brand or client’s site leans to the right, I might not want coverage.
How to Evaluate?
Much like the last tip, the best way to evaluate relevancy is to check what an author has written recently.
I can do that by looking at the author page or, if necessary, a Google search of recent articles.
16. Does the author write news stories? (vs op-eds or columns)
Occasionally, I’ll find an author who appears to be a great fit, only to find that they only write one specific kind of story, like an op-ed or column.
For instance, Laurie Roberts may appear to be a good fit for a post about Arizona politics.
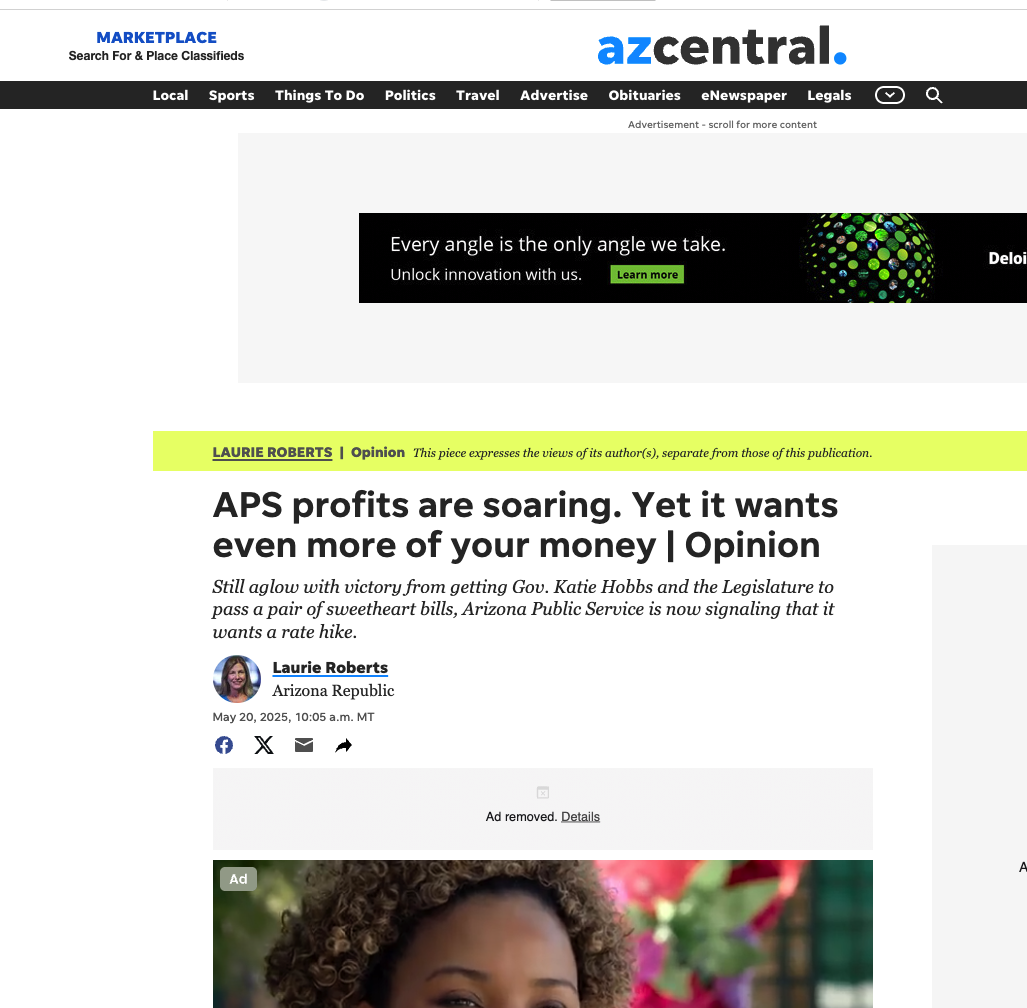
Yet, looking at her author page, I see that she is a columnist.

Clicking into some of her recent articles, I can confirm they are all op-eds.
How to Evaluate?
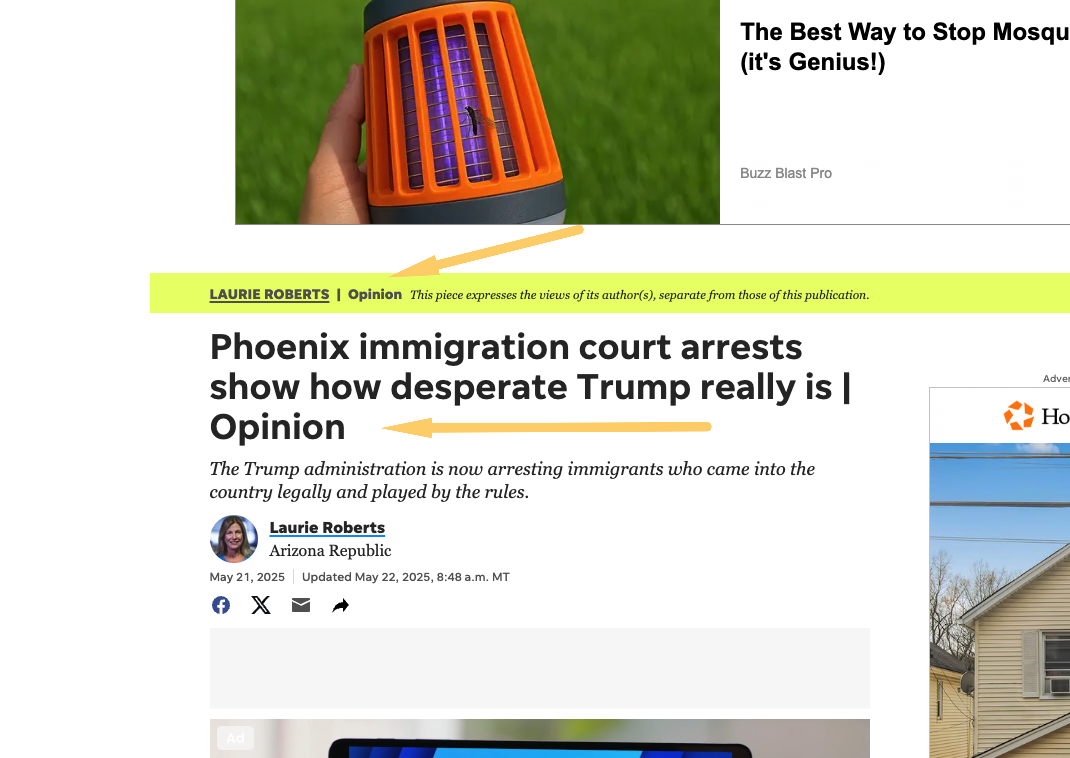
Look for obvious signs like the word “Columnist” in their job title.
You can also look for the word “Op-Ed” or “Opinion” along with the title:

In most cases, publications are usually very keen to point out that a column or op-ed doesn’t reflect the publication’s views:

Some journalists or publications have branded columns.
For example, Anna Holmes may seem like a good fit to pitch your job-related content, but “Work Friend” is a column on the New York Times offering advice on specific topics.

In these cases, journalists typically aren’t looking for pitches; they are writing their own stories, answering customer questions, or other self-reported insights.
17. Is the story new to the author?
Journalists want newness.
Remember, they want to get views for their articles.
Pitching a repeat story is not only a poor way to get coverage but also a good way to show the journalist that I’m not paying close attention to their work.
The only time this may not be the case is if I pitch a reactive piece or newsjack a story the journalist is actively covering; it’s OK to pitch a similar story as a follow-up.
How to Evaluate?
The best way to evaluate this is by looking at their recent articles.
You can also try a site:search for the author’s name plus the topic you want to cover.
Say I wanted to pitch a story about the rising cost of home buying in urban areas to Claire Boston.

If I do a “site:finance.yahoo.com ‘Claire Boston’ home costs”, I can evaluate all of her recent articles written about the topic.
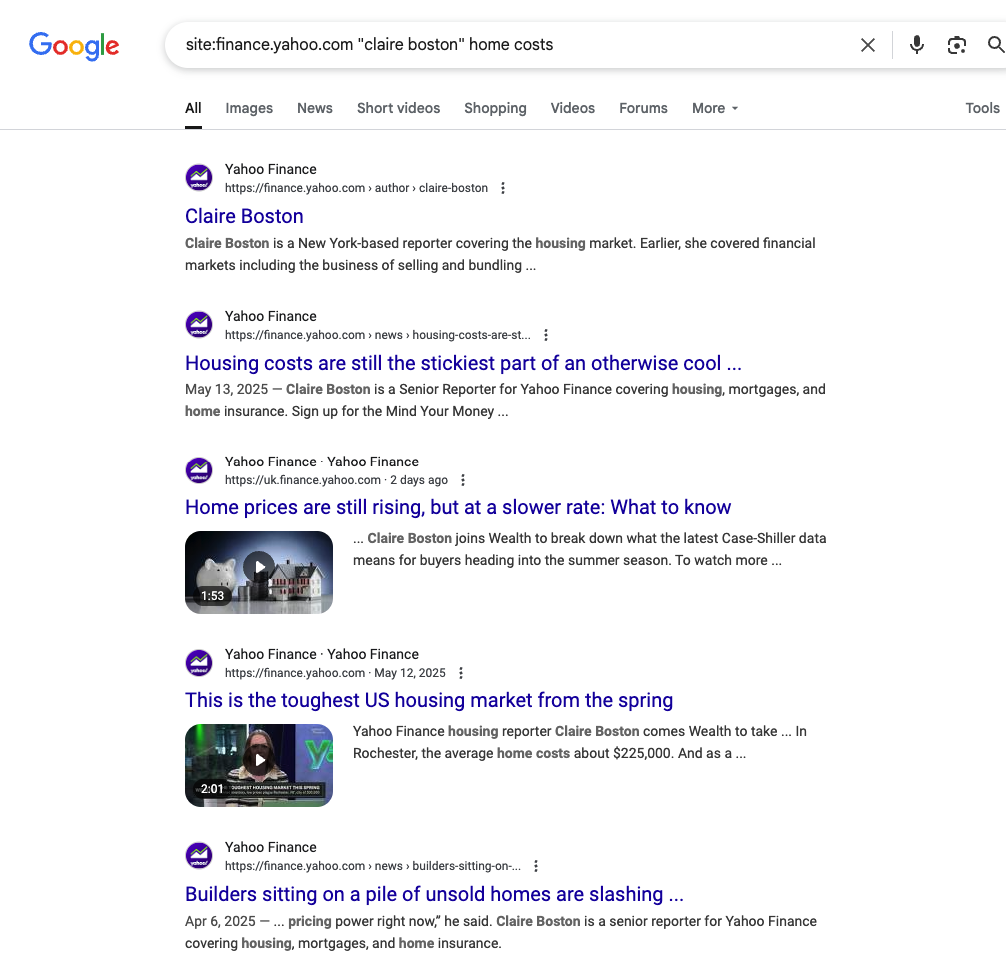
(For what it’s worth, I would probably pitch her about urban areas because it doesn’t look like she’s covered that angle specifically.)
18. Is the author in-house?
In-house writers and freelance writers are typically treated differently when it comes to pitching.
As journalist Rosie Taylor told me, when pitching in-house journalists, you are obviously much more likely to get featured in that publication. Still, it’s harder to get in-house journalists’ attention because they don’t have the time.
What that means is that I’ll naturally take a different approach.
Since in-house journalists are typically time-poor, they’ll need everything necessary to write a post.
Freelancers can be a little more open to pitching ideas for stories.
I’d also prefer to pitch freelancers because it can sometimes widen the potential pool of publications in which my story will be featured.
How to Evaluate?
The best way to evaluate whether a journalist is in-house or a staff writer is to look at their bio page.

Here it says Claire is a Senior Reporter.
Sometimes I’ll also check LinkedIn just to be sure.

I’m looking to see if her work at Yahoo Finance has a timeline set to “Present”.
(Though occasionally I’ll see someone who has multiple part-time jobs — one as a freelancer and another as a staff writer. So it’s always good to check all of the recent experience.)
Quick Recap
| Evaluation | ✅ Green – Proceed | ⚠️ Yellow – Needs Review | ❌ Red – Disqualify |
|---|---|---|---|
| Recent Activity | Published within 30 days | 30–90 days or inconsistent | No posts in past 3 months |
| Byline | Named individual author | “News Team” or multiple bylines | No author or “Staff” only |
| Topic Relevance | Covers your topic frequently | Related, but not a main beat | Off-topic (e.g., pitching health to sports writer) |
| Author Type | In-house staff writer | Freelance with multiple outlets | No clear affiliation |
| New to Topic? | Hasn’t covered your angle yet | Has covered something similar | Already covered your exact topic |
| Pitch History | Never pitched or positive prior response | Previously pitched, no reply | Repeated outreach with no engagement |
External Factors
There may be some external factors to consider when evaluating a site. These are specific to your business, your history, geography, and timing.
19. Is there a major news item dominating the location?
Natural disasters, extreme weather, violence, elections and other major news items can easily dominate a news cycle—especially in local markets.
For instance, as I write this, our team in Austin has been hit with a major storm.

The homepage features extensive coverage of the storm today.
As former journalist-turned-PR Collin Czarnecki of Noble told me,
“As a former journalist with experience in local newsrooms, I can tell you firsthand that inclement weather will push nearly any other news story or pitch to the back burner.
When severe weather hits, it’s all hands on deck in the newsroom.
Regardless of a journalist’s beat or typical coverage, they’re likely to shift their focus to the weather — especially in understaffed newsrooms (a reality for most newsrooms across the country).”
How to Evaluate?
The homepage is the best place to get a sense of how much a story or event is dominating the news cycle.
20. Have you reached out to this site or author in the past?
One of the benefits of conducting this outreach repeatedly is that you begin to develop relationships with journalists and website owners.
If you can lean on a relationship you’ve already established with a journalist, your chances of getting coverage increase in a big way.
On the flipside, if you’ve seen that you’ve reached out to a site or particular journalist multiple times in the past and they’ve never responded, it may make you reconsider.
How to Evaluate?
Really the only way to do this is by keeping track of your outreach.
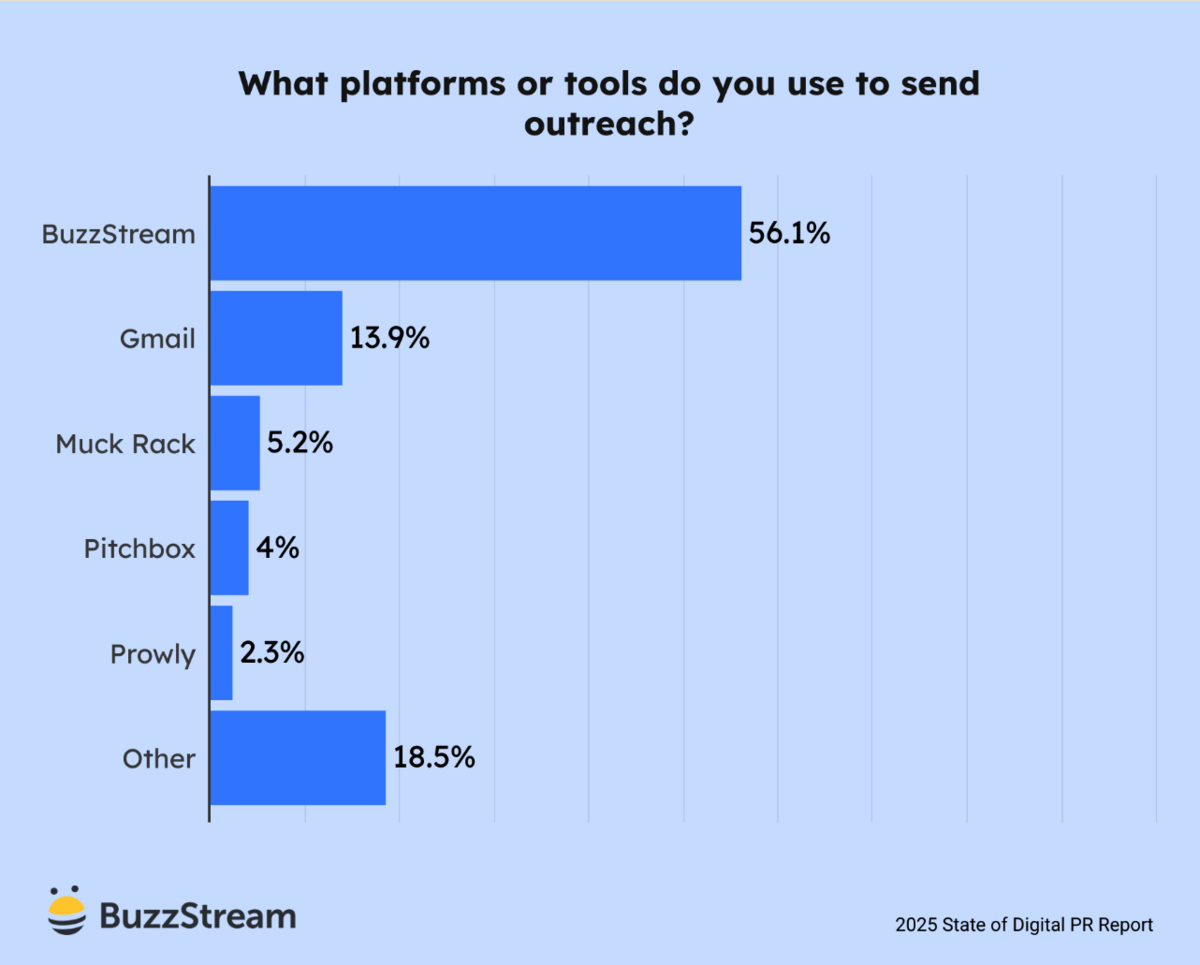
Some individuals and agencies use Google Sheets to track their outreach efforts. In fact, after BuzzStream, sending emails through Gmail is the second most commonly used tool for sending outreach.
Using BuzzStream, all previous contact history is available when researching a particular site. It displays what projects a site or journalist has been a part of, if they have responded, and, more importantly, if they have covered a story.
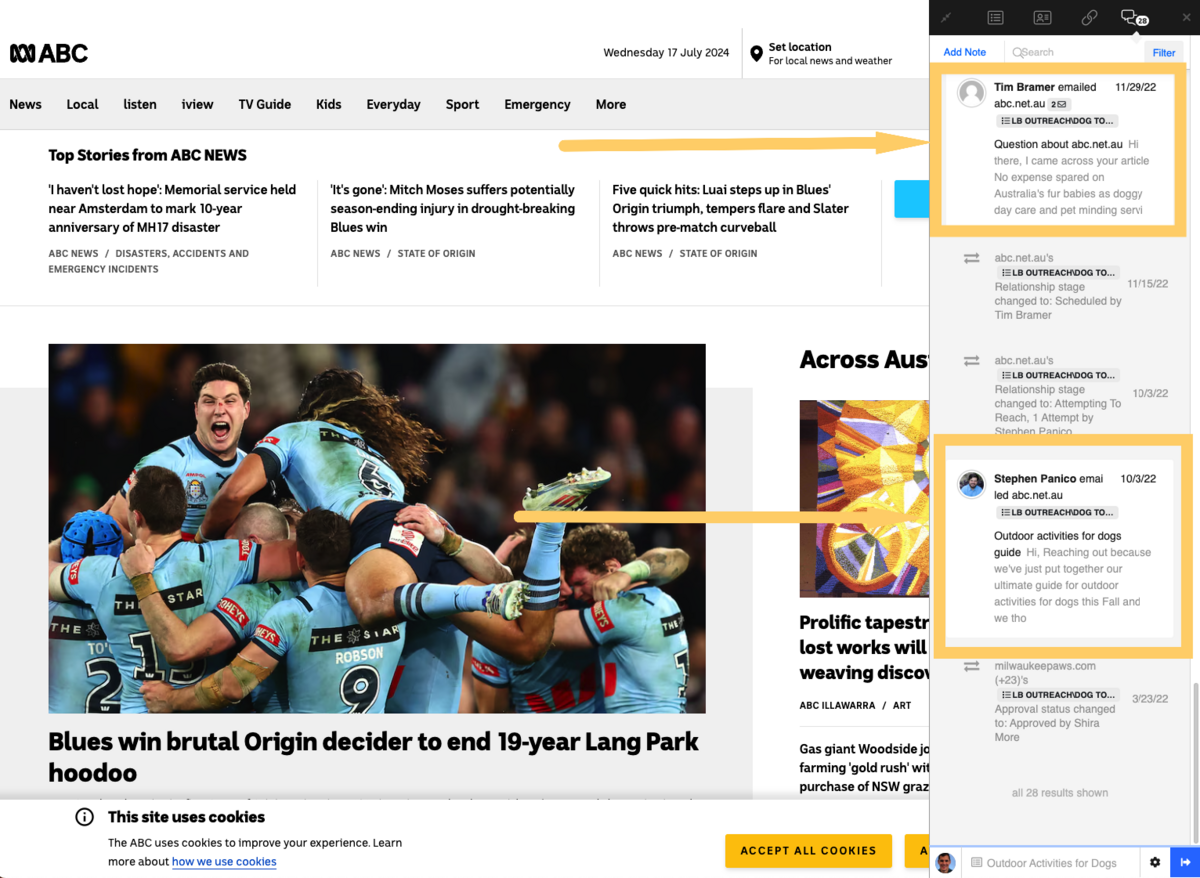
I used BuzzStream for six years while at Siege Media, and this was one of the most impactful features for scaling outreach (I wrote a whole case study about it).
| Evaluation | ✅ Green – Proceed | ⚠️ Yellow – Needs Review | ❌ Red – Disqualify |
|---|---|---|---|
| Local News Cycle | No dominating story | Mild local disruption | Major news event dominating front page |
| Outreach History | Past engagement, replies, or coverage | No response yet but not excessive | Ignored or bounced >3 times |
How to Speed Up This Process
Although this may seem like a lot, much of this will become second nature as you practice it.
Aside from some of the tools already listed, our new Chrome Extension, ListIQ, can help to speed up this entire process and help you do a lot of it at scale.
I will enter a search query in Google News.

Then enable the ListIQ Chrome extension. I’ll then have the option to analyze the URLs in my SERP for specific factors:
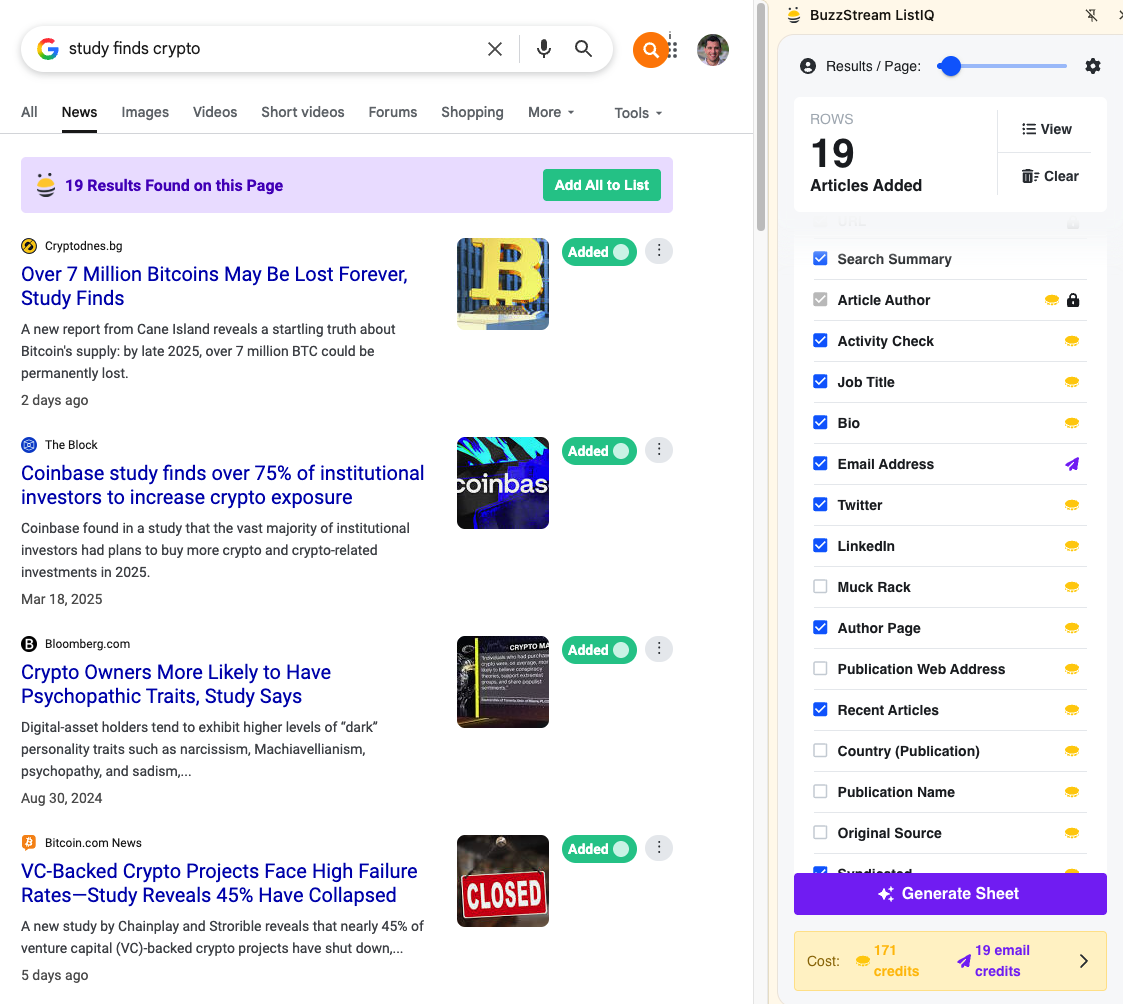
Certain elements significantly speed up my evaluation process:
- Whether the journalist is still active at the publication (so I know I’m reaching someone who is still writing articles within the past 30 days)
- Their current email address (so it doesn’t bounce)
- Their recent articles (to see what they’ve written and determine if my story is indeed relevant), syndication status (to understand if an article is the original or a syndicated copy so I reach the correct author).
Get started with ListIQ for free today.
Every Site, PR, and Agency is Unique
Remember that every agency, client, and industry has their specific nuances that make it unique.
For example, maybe a client doesn’t care about backlinks and just wants their brand name mentioned. Therefore, step 8 may not be necessary.
There are also many more minute details to consider when evaluating a site that I didn’t cover, such as UI/UX issues like the presence of intrusive ads or a paywall. There are also off-page considerations, such as the actual level of engagement the site receives beyond what the metrics indicate.
However, this post covers what I think are some of the more critical factors to consider when evaluating a site for outreach.

 End-to-end outreach workflow


 Check out the BuzzStream Podcast


